For this challenge I was sick the first day we worked on our design. So being a day behind didn't exactly work to my advantage. I chose not to work with another group, that probably didn't help much either. I started by finding what I wanted my graffiti to look like, I'm not the most skilled so I went with probably what was the easiest thing I could find. After I got that planned out (Thank you Pinterest!), I actually started to sketch. In the slideshow below you can find my very first sketch. The next day I started on my final draft, which turned out not to be the actual final draft. The original plan out for the tag was, too elaborate for me to get it to look nice, so I ended up restarting my final draft. This was what I would think was the hardest project for me to complete, some of the setbacks I encountered were quite frustrating. But now that this project is done I can breath easier for a while. | 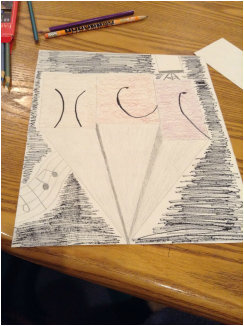 (Above) The Final Project (Below) Process Pictures for the 1st Final Draft -The First Final Draft Will NOT be Shown |
0 Comments
For this we were given four options we could work with how art impacts a culture, how a images impacts someones ideas, emotions, or actions, research the meaning behind someones artwork, or find information on how someone would critique, and what makes their standards different then other people. I chose to do how images impact someones actions. If you have an Instagram you most likely saw someone post about the ALS Ice Bucket Challenge. In the image below I talked a little more about it. In my opinion if someone saw a little kid with a life threatening illness it would make them want to donate and help in some way. 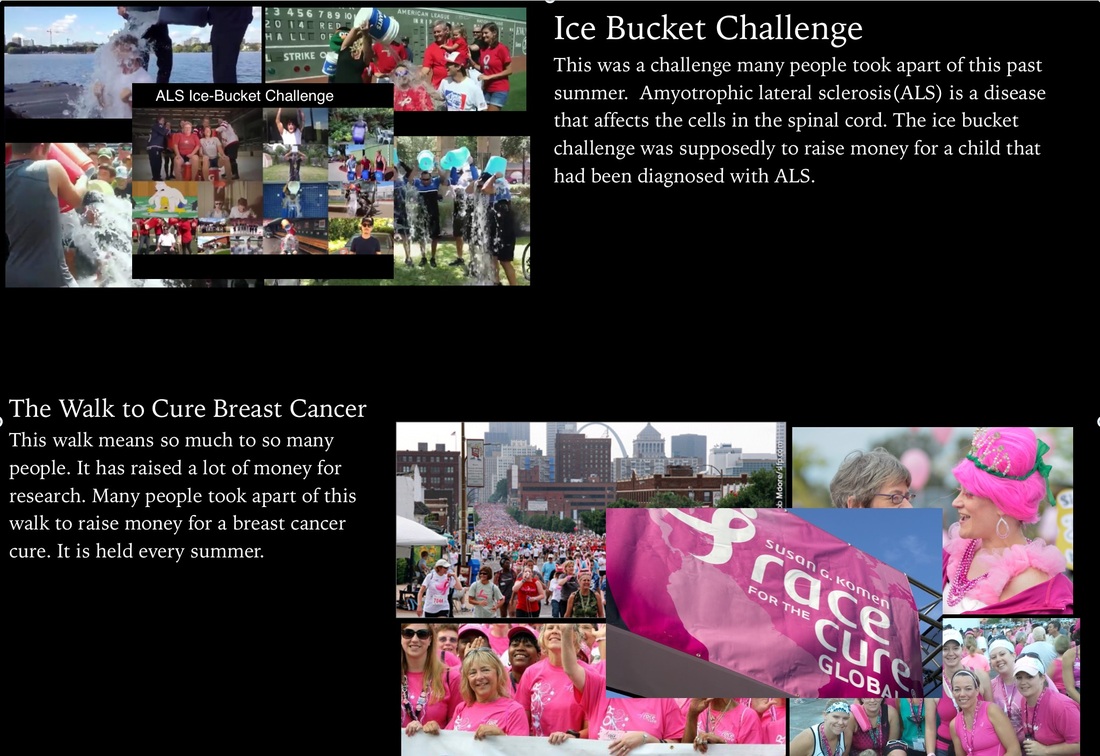
I also did a little research on The Walk To Cure Breast Cancer, it's an annual event that raises a lot of money for research. I showed this to one of my classmates and she immediately said that she wanted to go and participate in it. Images can show events that have impacted peoples lives, and can influence their actions.
For this project I chose to do the first option, which is to become a museum curator, I basically needed to create the criteria and figure out what it was going to be about. the first thing I needed to do was to create a keynote (which is kind of like power-point for windows), and came up with the basic outline of the project. the keynote included the name of the exhibit, the criteria, and some examples of what could possibly go into this exhibit. I named it "around the world" because I want to travel and this is the closest I can get to some of these places right now. I really enjoyed making this presentation, and I hope you enjoy it as well. If you click the button below you can go though it. (Some of the slides have a bit more information because the source I used had more information that i thought you might like to know)
For this project I didn't exactly know how it was going to turn out or exactly what I was going to do. I randomly decided to try to free hand draw a hand. And it didn't turn out so bad. I started out in pencil so that if I messed up I could easily change it. Once I had a basic sketch I liked, I went over the pencil with a black colored pencil. After that I started to add the shadows and color to the hand. I later added the shadow on the bottom surface and the color to the background.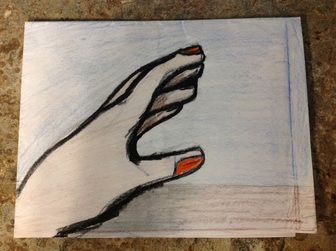 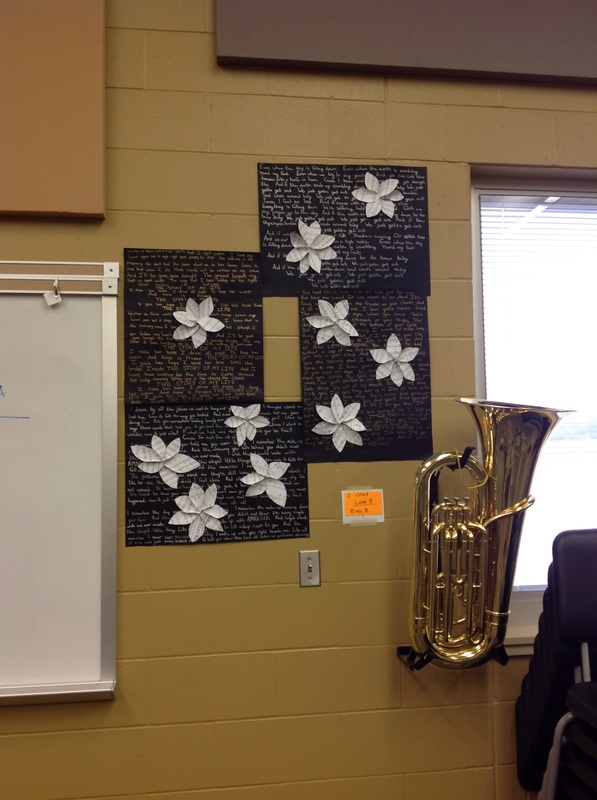 Final Product For my project i did an installation project with Raquel, we both enjoy music so we wanted to do a music theme. We decided to write lyrics on black paper, then put flowers that we made out of sheet music on top of it. We got our inspiration on pinterest, and twisted the idea to make it our own. The songs that we used for the background were Amnesia, Gotta Get Out, both by 5 Seconds of Summer, Story of My Life, and Little Things both by One Direction. If you want to see Raquel's point of view on this project or some of her other work her blog is here. Process Pictures Below 1. The absolute first thing that you have to do is design and sketch your logo. 2. Once you have a design that you are in love with, you get a block of linoleum. 3. When you get your block you want to get your sketch and shade on the back of it. 4.Then you put it on you block of linoleum and with you pencil and push hard so the your design will be transferred onto the linoleum. 5. After you've done that you want to carve out whatever you want to be white, or whatever color of paper you print on. 6. Now your ready to print. you will need print making ink, a tray and a brayer. you need to spead the ink on the tray using the brayer. 7. After you'v spread the ink and covered the brayer, you need to roll the ink on the linoleum block, and make a run. If you want to have more than one color carve out want you want to be the first color you printed with. than repeat steps 6 & 7. Keep printing until you have at least six good ones. 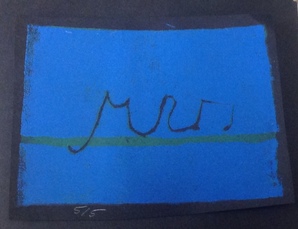 I designed my logo this way for a certain reason. In school I am very involved in the music program, hence the music note. The letters, very simply, are my initials. My logo was very simple, and easy to design. It holds something represents part of who I am, and I am proud of what I ended up with. :)
| MadiWelcome to my blog! I will be posting about some of my art projects, I hope you enjoy it! 
|
